Run your first show
Create a room without an account, start a timer, put it on a second screen, send the speaker a message, and keep the room for next time.
Last checked against CueStride on 5 October 2026.
This page takes you from nothing to a running show in a few minutes: a room with a timer, the timer on a second screen, a message to the speaker, and the room kept for the next show. You need one device to run the show from, such as a laptop, a tablet, or a phone. You also need a second device with a web browser to be the speaker’s screen. A spare laptop, a tablet, another phone, or a TV’s own browser will do.
The steps are for someone who is not signed in to CueStride, which is how most first shows start. If you are signed in as an account’s admin, Create room puts the room straight into your account, on your plan, and the controller has no notice about keeping it. A moderator cannot create rooms.
Create a room
A room is one stage. It holds the timers, the messages, and the links for everyone who joins.
- Open a new room, or choose Create a free room at the top of this page.
- Type a name for the room if you want one, then choose Create room. There is nothing to sign up for.
The room opens on its controller, the page you run the show from. It already has one timer, Timer 1, ten minutes long and ready to start.
A room made without an account runs on the free plan, Starter. It holds up to 3 timers, and up to 3 screens can be open at once. Your own controller counts as one of those screens.
Find your way around the controller
Here is a meetup’s controller five minutes before the end of the lightning talks, with a message on the screens. Each number marks a part of the controller, and each part’s section below says what it does. Your room starts simpler, with one timer and no messages.

1. Room name

The name you gave the room at Create room, or New room if you left it blank. Once you keep the room, this name is how you find it on your Rooms page. To change it, use Settings.
2. Connection and screens

- Live, with a green dot, while the controller is connected. If the connection drops, it says Reconnecting, and the screens keep counting from what they last knew.
- Two counts: the screens connected now (the monitor icon) and the controllers (the sliders icon). Choose them to open Live connections, the list of every connected screen, where you can name a screen, make it identify itself, reload it, or disconnect it. Your own controller counts as one of the room’s screens, which the plans set.
- The clock estimate: settling for the first minutes, while CueStride measures this device’s clock against the server’s, then stable.
On a phone’s narrow screen, this part is hidden.
3. Links

The room’s three links: the Viewer link for every screen, the Agenda link for a screen at the door, and the Controller link for the people running the show. Each controller link carries its own key, and you can revoke one that leaked. How to use them: Put the timer on a second screen.
4. Settings

The room’s name, its time zone, a 12-hour or 24-hour clock, and the yellow and red wrap-up times new timers start with. At the bottom, Delete room deletes the room and everything in it, after you confirm.
5. Keep the room

Shown on every visit to a room made without an account, until you keep it. It holds the controller link, your only way back to the room. How to keep it: Keep the room for next time.
6. Preview

What the screens show right now, drawn by the same code: the timer’s title, the countdown, the speaker, the progress bar, and any message that is showing. The countdown turns yellow, then red, as the end nears.
7. Timeline

The running timer from its start to its end, with the playhead at the time left. Drag the playhead to jump forward or back in the timer: its length stays as it was. The end of the bar turns yellow and red where the timer’s wrap-up times are.
8. Transport

- Start runs the cued timer, and turns into Stop, which pauses it.
- Reset puts the timer back to its full length, stopped.
- Next stops the timer and cues the one after it, ready to start.
- Prev, while a timer runs, puts it back to its full length, as Reset does. While it is stopped, Prev cues the timer before it.
How: Run the timer.
9. Adjust time

−1m and +1m take away or add a minute. The second pair does the same with the amount in
the menu below them, or with one you type, such as 2:30. They work while the timer runs or is
stopped, and never change the timer’s length, so Reset still restores it. Taking away more
than is left puts the timer straight into overtime.
10. Screens

Blackout hides everything on every screen until you turn it off. Flash makes the countdown’s digits blink three times on every screen, to catch the speaker’s eye without a word.
11. Rundown

Your timers in order, one per segment, under the day they run. Live marks the cued timer, the one the transport runs; Next marks the one after it. Choose a timer to cue it.
Each row has Edit, Duplicate, and Delete, and you drag a row to move it. Add timer adds one at the end, and Add in a day’s heading adds one on that day. How: Set the timer’s length.
12. Messages

Messages you write before the show and show with one click. Show and Hide put a message on the screens and take it off. Focus fills the screens with it. Flash message makes the showing message blink. Each message can be edited, deleted, or dragged into another order. How: Send the speaker a message.
13. Keyboard shortcuts

Space starts or stops, R resets, → or N goes to the next timer and ← or P to the previous one, + and − add or take away a minute, B is blackout, and F is flash. They do nothing while you are typing in a field.
Set the timer’s length
- In the rundown, choose Edit, the pencil beside Timer 1.
- Give it a Title, such as the name of the talk, and set its Duration:
10:00for ten minutes,1:30:00for an hour and a half, or90sfor ninety seconds. - Choose Confirm.
The same dialog holds a speaker’s name, notes the screens never show, how the timer starts, and when the screen turns yellow and red near the end. One timer is enough for this first show.
Put the timer on a second screen
- On the controller, choose Links (the chain-link icon on a phone).
- Copy the Viewer link and open it in the browser of the second device. You can email it, message it, or type it. The screen needs no account and no sign-in.
- To fill the screen, move the pointer or tap the screen. A small toolbar appears in the corner for a few seconds. Where the browser offers fullscreen, the toolbar has a button for it, an expand icon named Enter fullscreen. Some phone browsers don’t offer it.
The same dialog has the Controller link. It gives full control of the room, so share it only with the people running the show.
Run the timer
- Choose Start. The controller’s preview and the second screen count down together.
- Choose Stop to pause, and Start again to carry on from where it stopped. The Space key does the same: it starts a stopped timer and stops a running one, except while you are typing in a field.
- Use the buttons under Adjust time to give the speaker more time or less, while the timer runs or while it is stopped. Taking away more than is left puts the timer straight into overtime.
- Choose Reset to put the timer back to its full length and stop it, and Start to run it again. Time you added or took away does not change that length.
Send the speaker a message
- Under Messages, type in Message for the stage, for example “Five minutes left”.
- Pick a colour, choose Bold or Uppercase if you want them, and choose Add. The message waits in the list. Nothing shows on the screens yet.
- Choose Show beside the message. It appears on every screen with the timer, and it stays until you choose Hide.
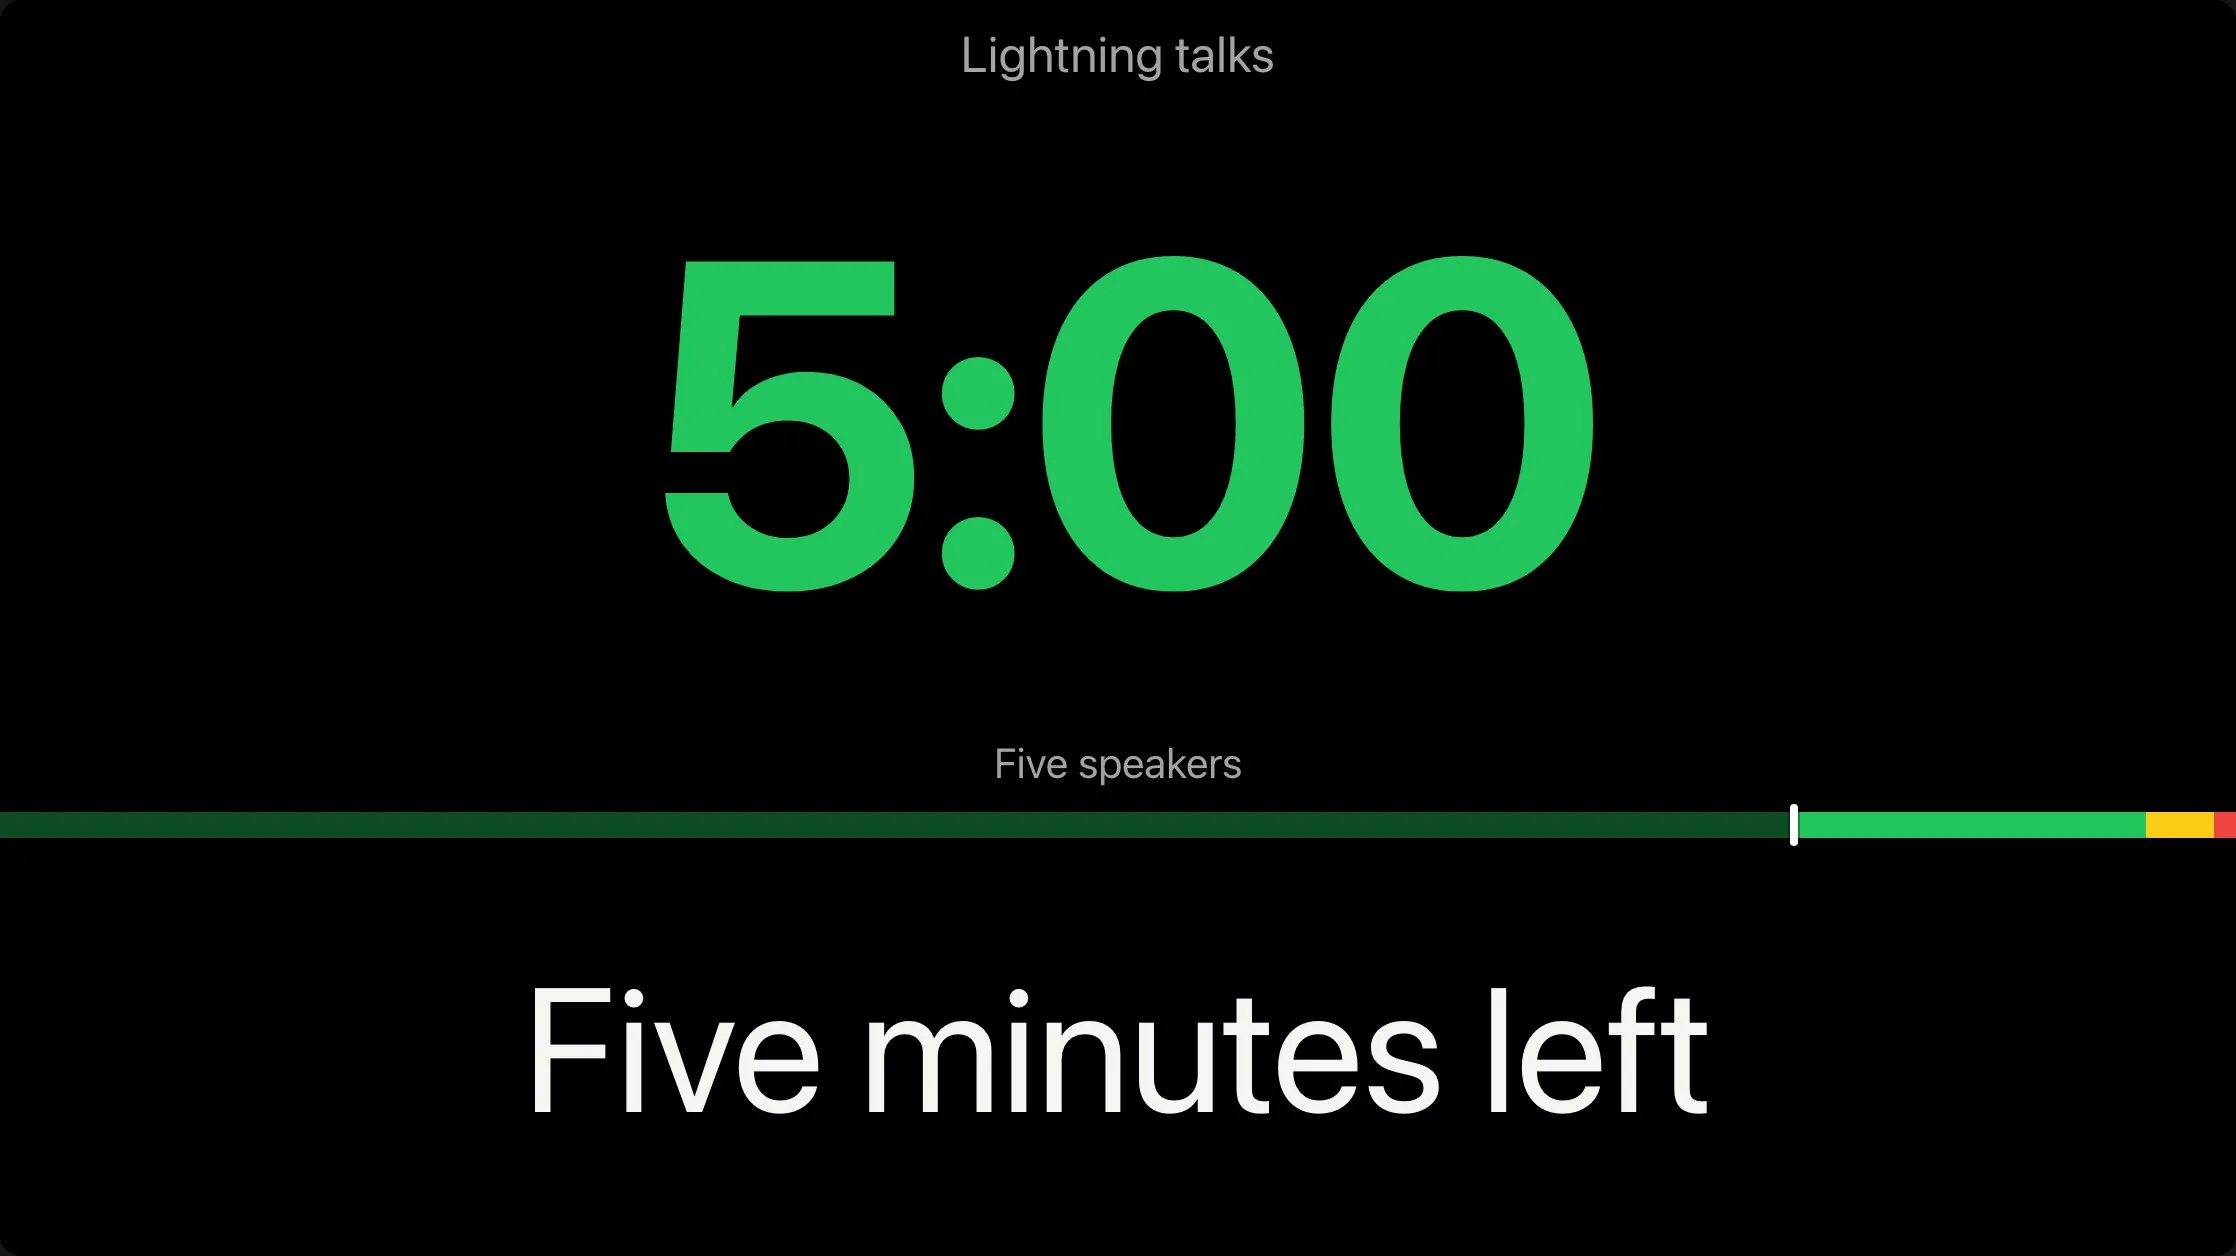
Only one message shows at a time: showing another hides the first. Flash message makes the showing message blink three times, to catch the speaker’s eye. Focus fills the screen with the message and hides the timer, until you turn Focus off, hide the message, or show another one.
Keep the room for next time
Until you keep it, the room belongs to nobody. The controller says so at the top, every time you open it: This room is not saved to an account. Its controller link is the only way back to the room, and a room nobody keeps is deleted after 90 days without use.
- Copy the controller link from that notice and keep it somewhere safe, or
- Choose Sign up free to keep it. Once you have signed up, you land on your Rooms page with the room already in your account. Any other room this device made without an account is offered there too, with Add to my account.
- If you open the controller while signed in as an account’s admin, the notice offers Add to my account instead. Signed in as anyone else, it says that only an admin of an account can add rooms to it.